Phil Bergstedt
DIY-Audio Blog
Phil Bergstedt
DIY-Audio Blog

  • Home
  • About

  • PROJECTS

  • Powered Wire - Class A
  • ESP P06 - Phono Preamp
  • ESP P180 - Power Meter
  • 1A Power Supply
  • ChipAmp LM3886
  • JHL-1969 10W Class A
  • The Case
  • Shaker Amp w/Fan Ctrl

  • LINKS


    CONTACT


©2004-2019 Philip Bergstedt. All photographs appearing on this site are the property of Philip Bergstedt (except noted). They are protected by U.S. Copyright Laws, and are not to be reproduced without the permission of Philip Bergstedt. All Rights Reserved.

The Shaker Amp with Fan Controller

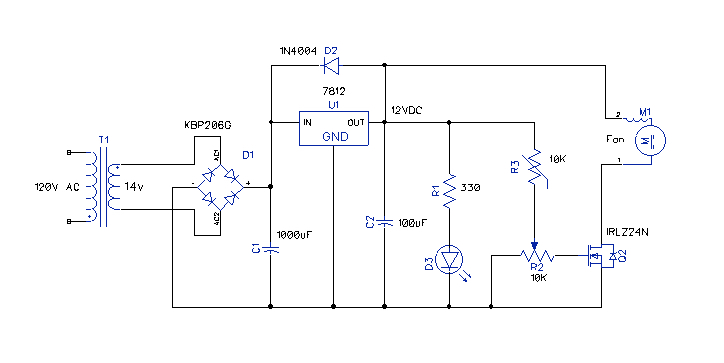
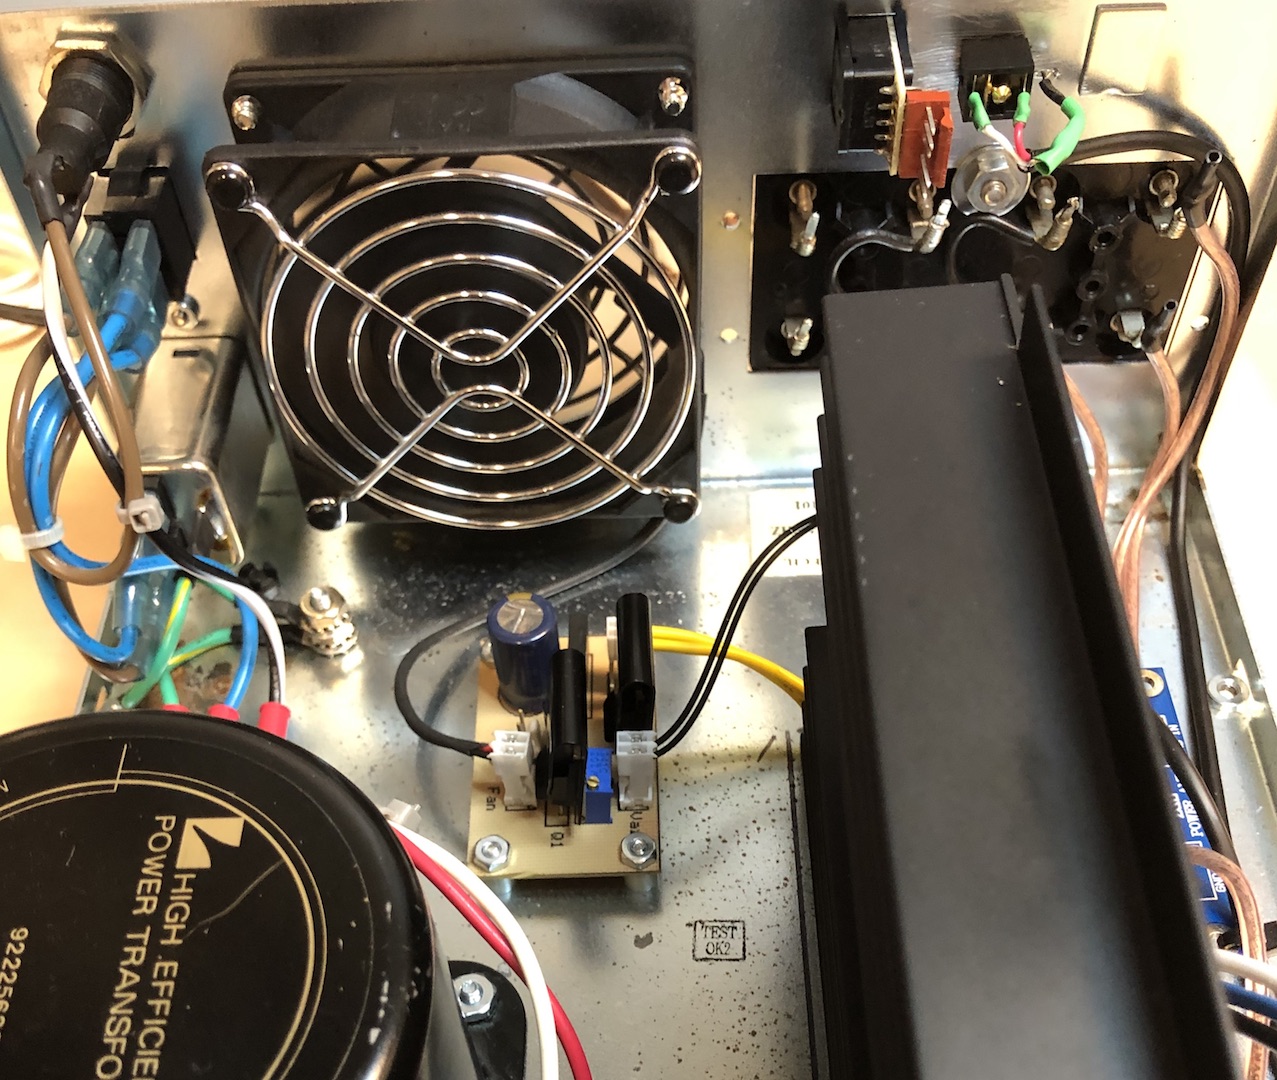
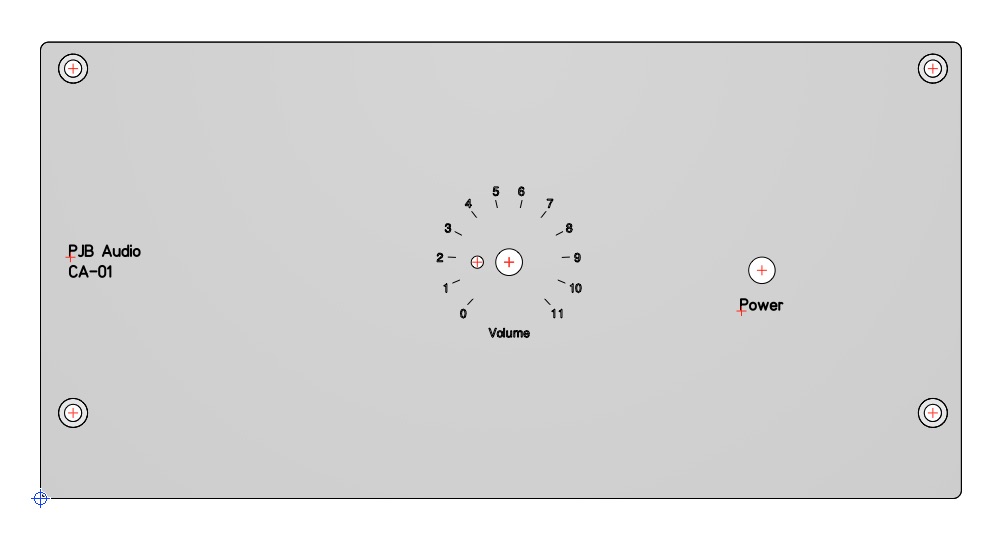
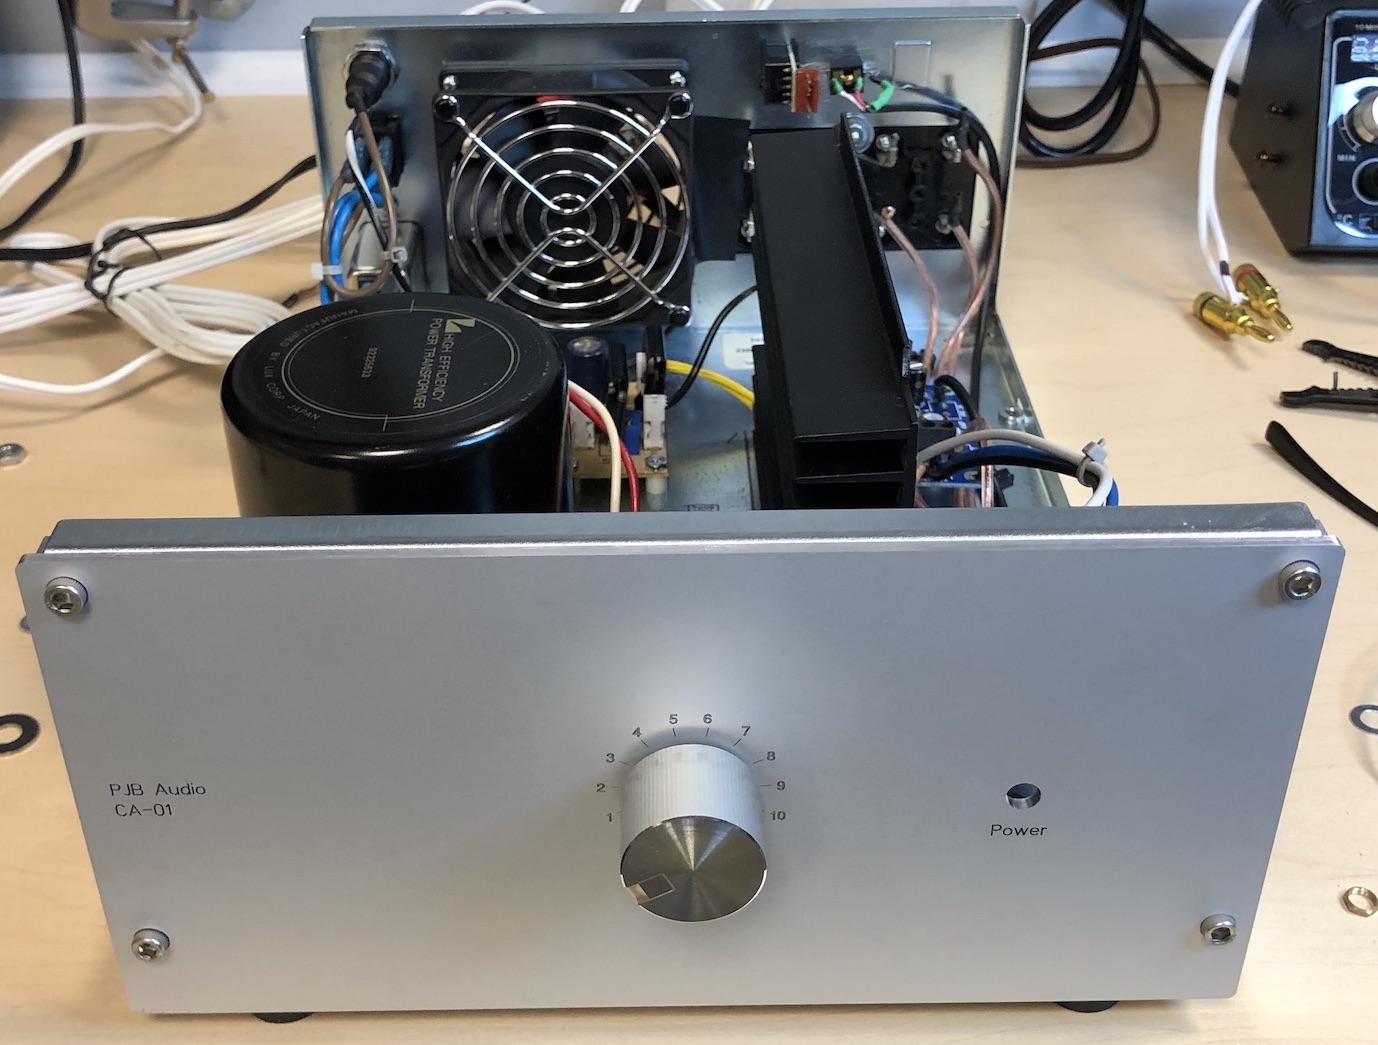
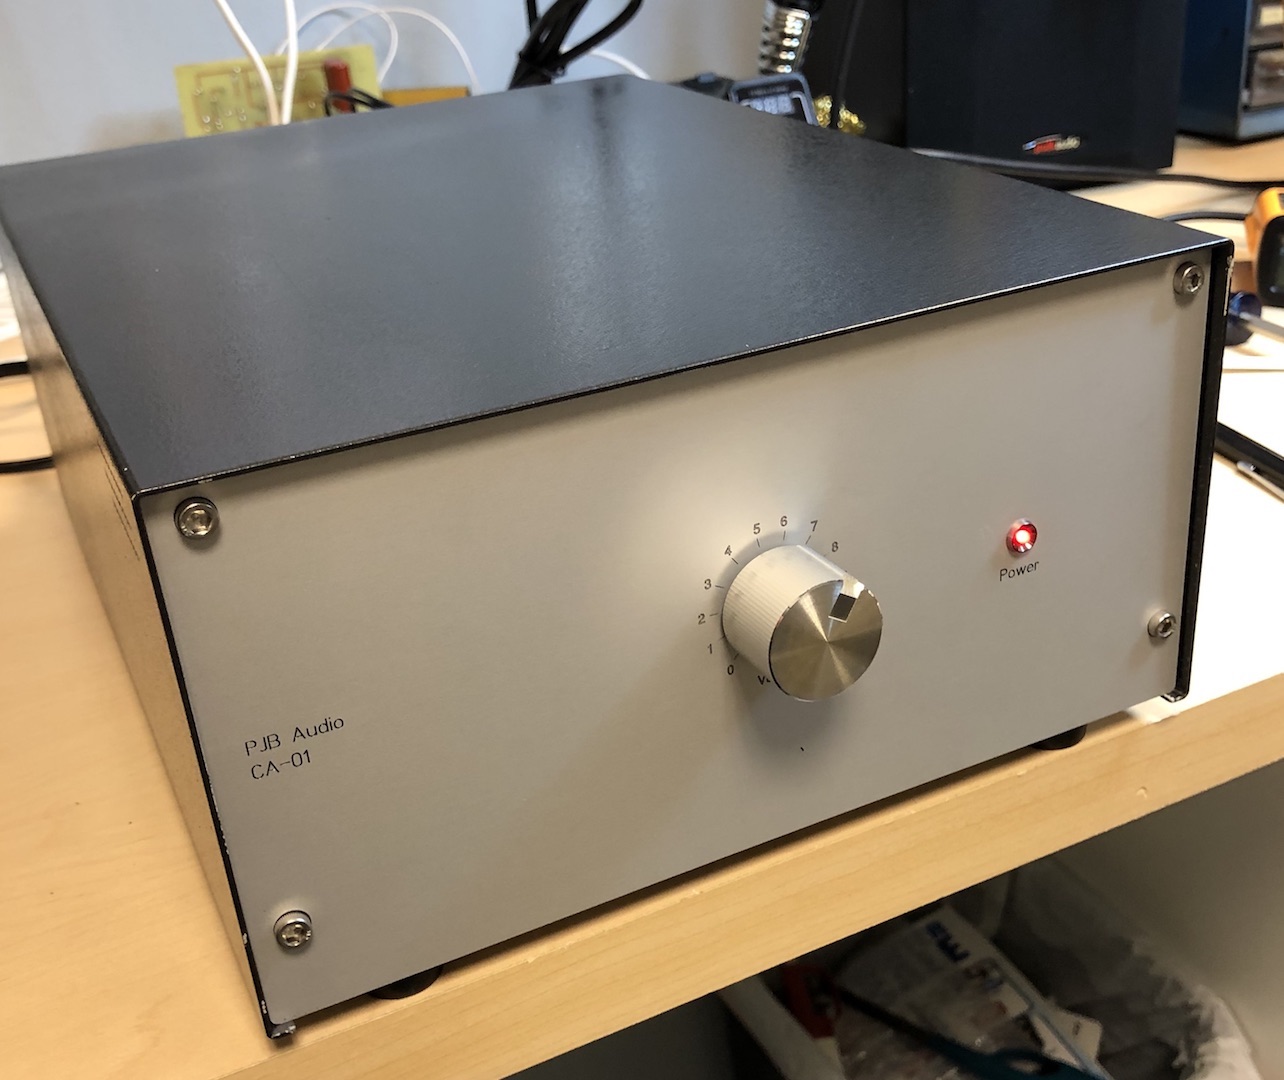
I took a couple weeks off around the Christmas holiday (2019) and was looking for a project. I wanted to replace the amp that powered my theater room seating shakers (Tactile Transducer Bass Shaker). I had a bunch of unused stuff around and decided to resurrect the old Gain Clone Amplifier boards. I had an old LTO-8 tape drive case. I had stripped out everything but the fan and power switch. The only issue with the case was it did not have a face plate. I discovered Front Panel Express (link), and was able to design and purchase a new front panel for under $50 US. I also wanted to control the fan based on heat sink temperature, so I designed and built a Thermistor based control circuit. Pictures and descriptions below:


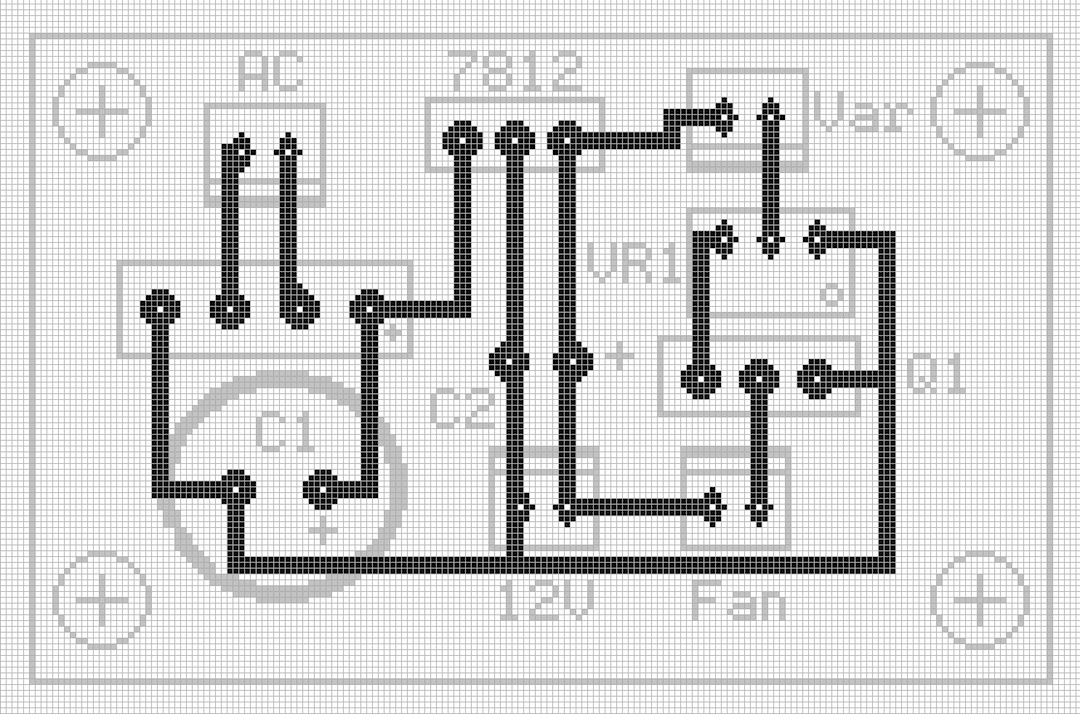
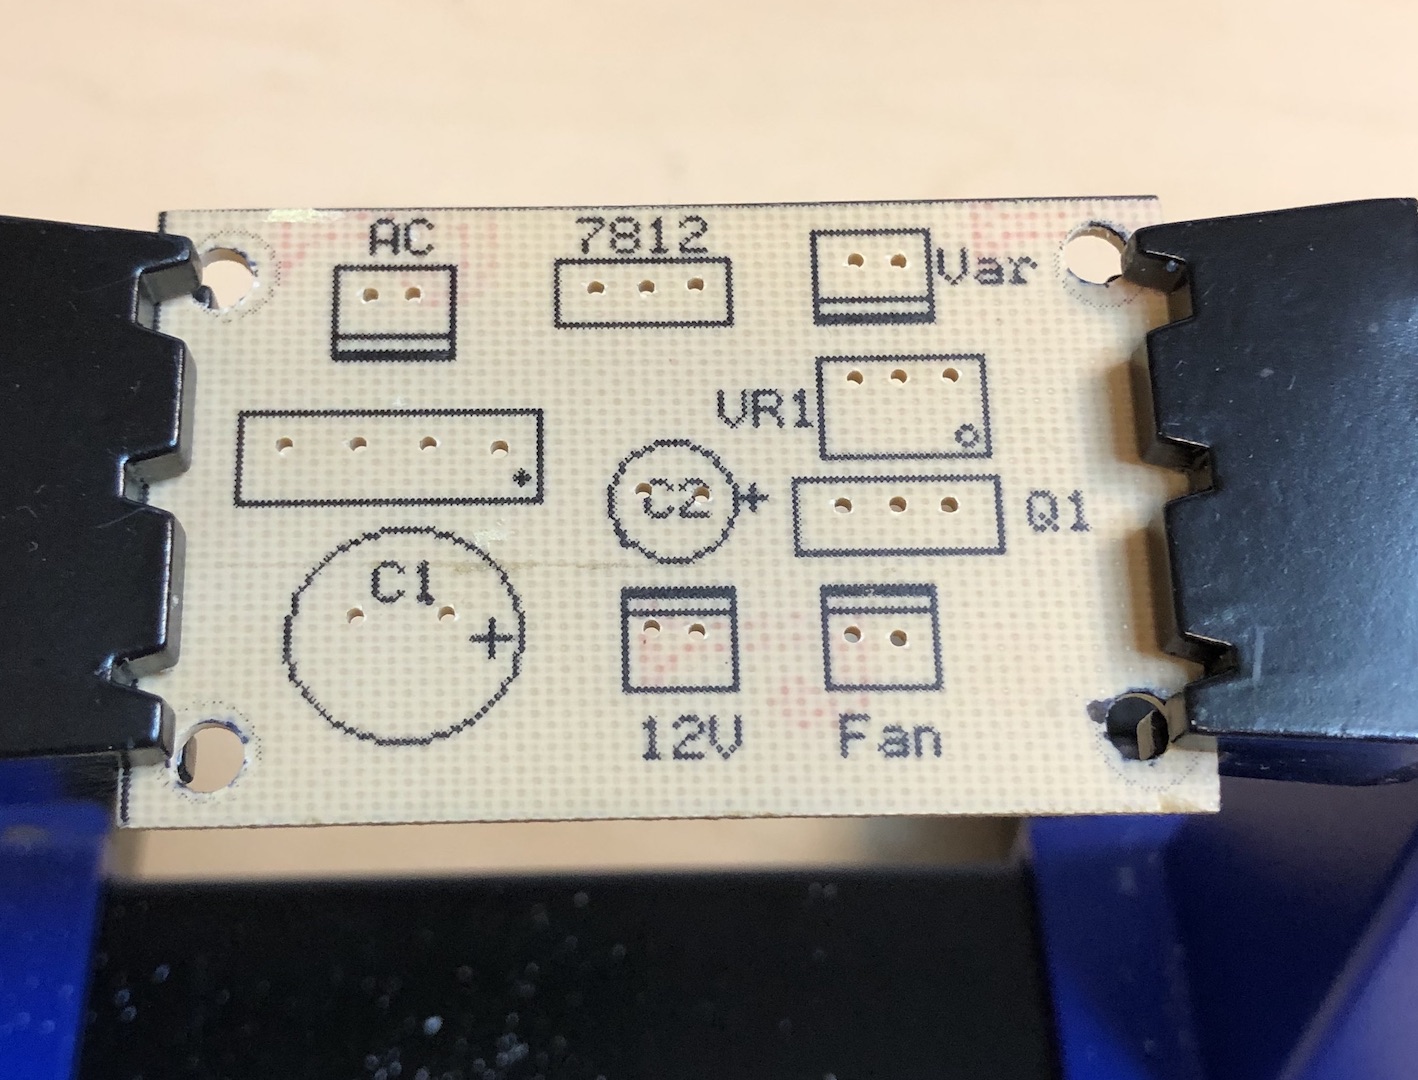
Schematic for the Thermistor based fan control circuit:

 Schematic

PCB design with silk:

 PCB design

Drilled control board:

 Board build

First test of the fan control board, set the MOSFET Gate voltage to 1.8VDC, about 75 degree:

 First Test and Temp Set

Mounted with TO-220 clip on heat sinks for the 7812 regulator and MOSFET transistor:

 Mounted with TO-220 clip on heat sinks

Using the free Front Panel Designer 6.21 software for Mac, I was able to create the front panel design (easy and straight forward). The only issue was with the volume control, I was not able to find a way to create it natively in the tool. I did find a cool web site "MCS Scale-o-matic" (http://stiftsbogtrykkeriet.dk/~mcs/Scale.html) to design and create a scale and save as an HPGL file that I could import (an yes this one goes to eleven !!!).

 Panel Design

The front panel took about 5 business days to create and 3 to ship, it came well packed without any damage from Seattle.

 Front panel installed

Final assembly, completed project:

 Completed project

Shaker Amp Conclusion:

The only thing new in this project was the use of “Front Panel Designer.” The ability to create a professional looking front panel really enhances the DIY project. I highly recommend you check out Front Panel Express. I’ll be a repeat customer. I was happy I could use so many of my leftover parts and create a functional amp to power my Shakers. The fan control works as designed, usually turns on in about 5 minutes into use, and keeps the heat sink cool due to air flow from front to back across it.
What fun is it to build something if you can't share it...